DOM Manipulation: part I
DOM manipulation is one of the fun parts of JavaScript. If you have heard about the DOM but are unsure what it is, keep reading. I promise practical and fun examples! I will go through the following concepts:
You can think of the DOM (Document Object Model) as a tree that represents the structure of an HTML document. Why as a tree? Because an HTML page contains different tags organized by a certain hierarchy, as you can see below:
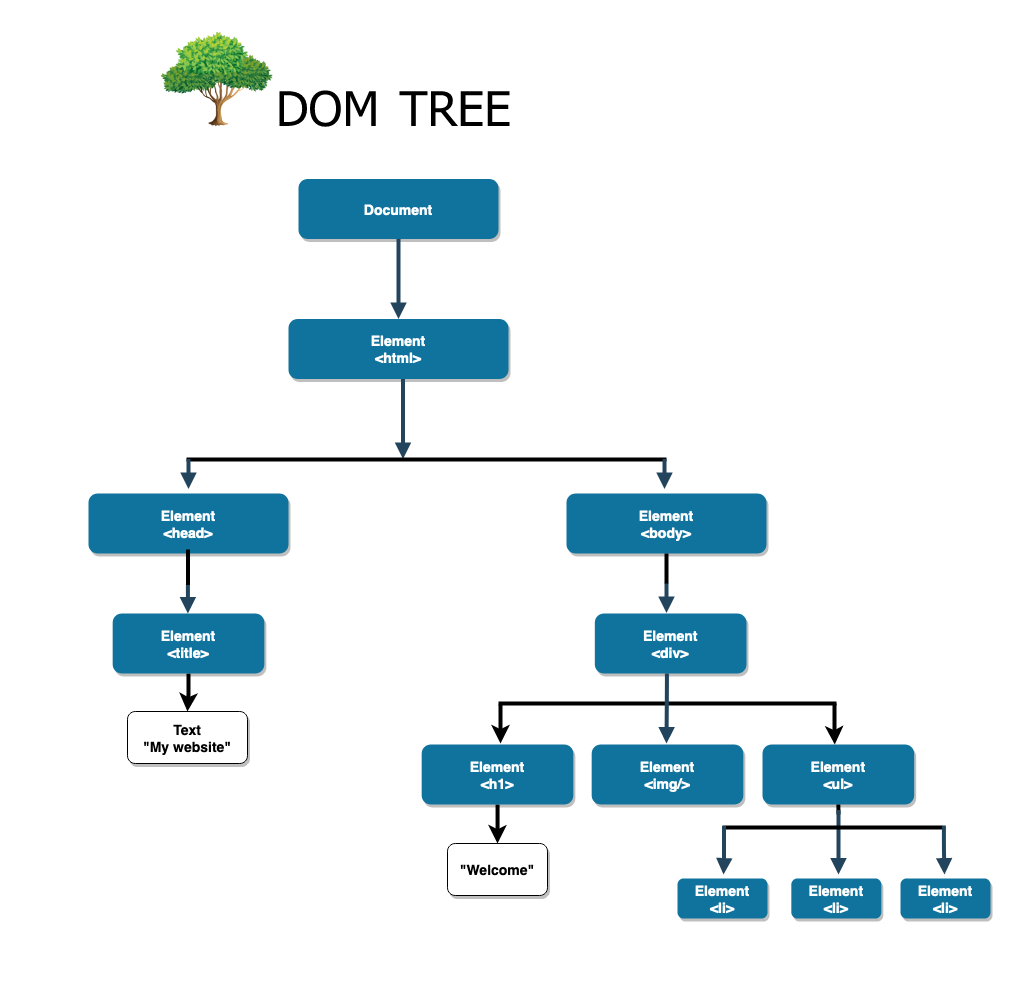
The DOM tree contains items called nodes, which can be:
- Element Node → node that has an element
- Text Node → node that has text
All these nodes are like a big family: there are parent nodes (nodes that have 1 or more children), sibling nodes (nodes that share the same parent node), child nodes (nodes that have parent nodes) or descendent nodes (nodes that are nested in the tree).
In the previous example, the h1, img and ul are siblings, as they are at the same level and have the same parent (div) The li elements are childnodes of ul.
Thanks to JavaScript we can manipulate the DOM structure, content and styles and have a lot of fun! In order to access the DOM, we can use the variable document.
DOM selectors
There are many different methods to select elements from the DOM like getElementById(), getElementsByClassName() or getElementsByTagName(), but let's focus on the most modern ones:
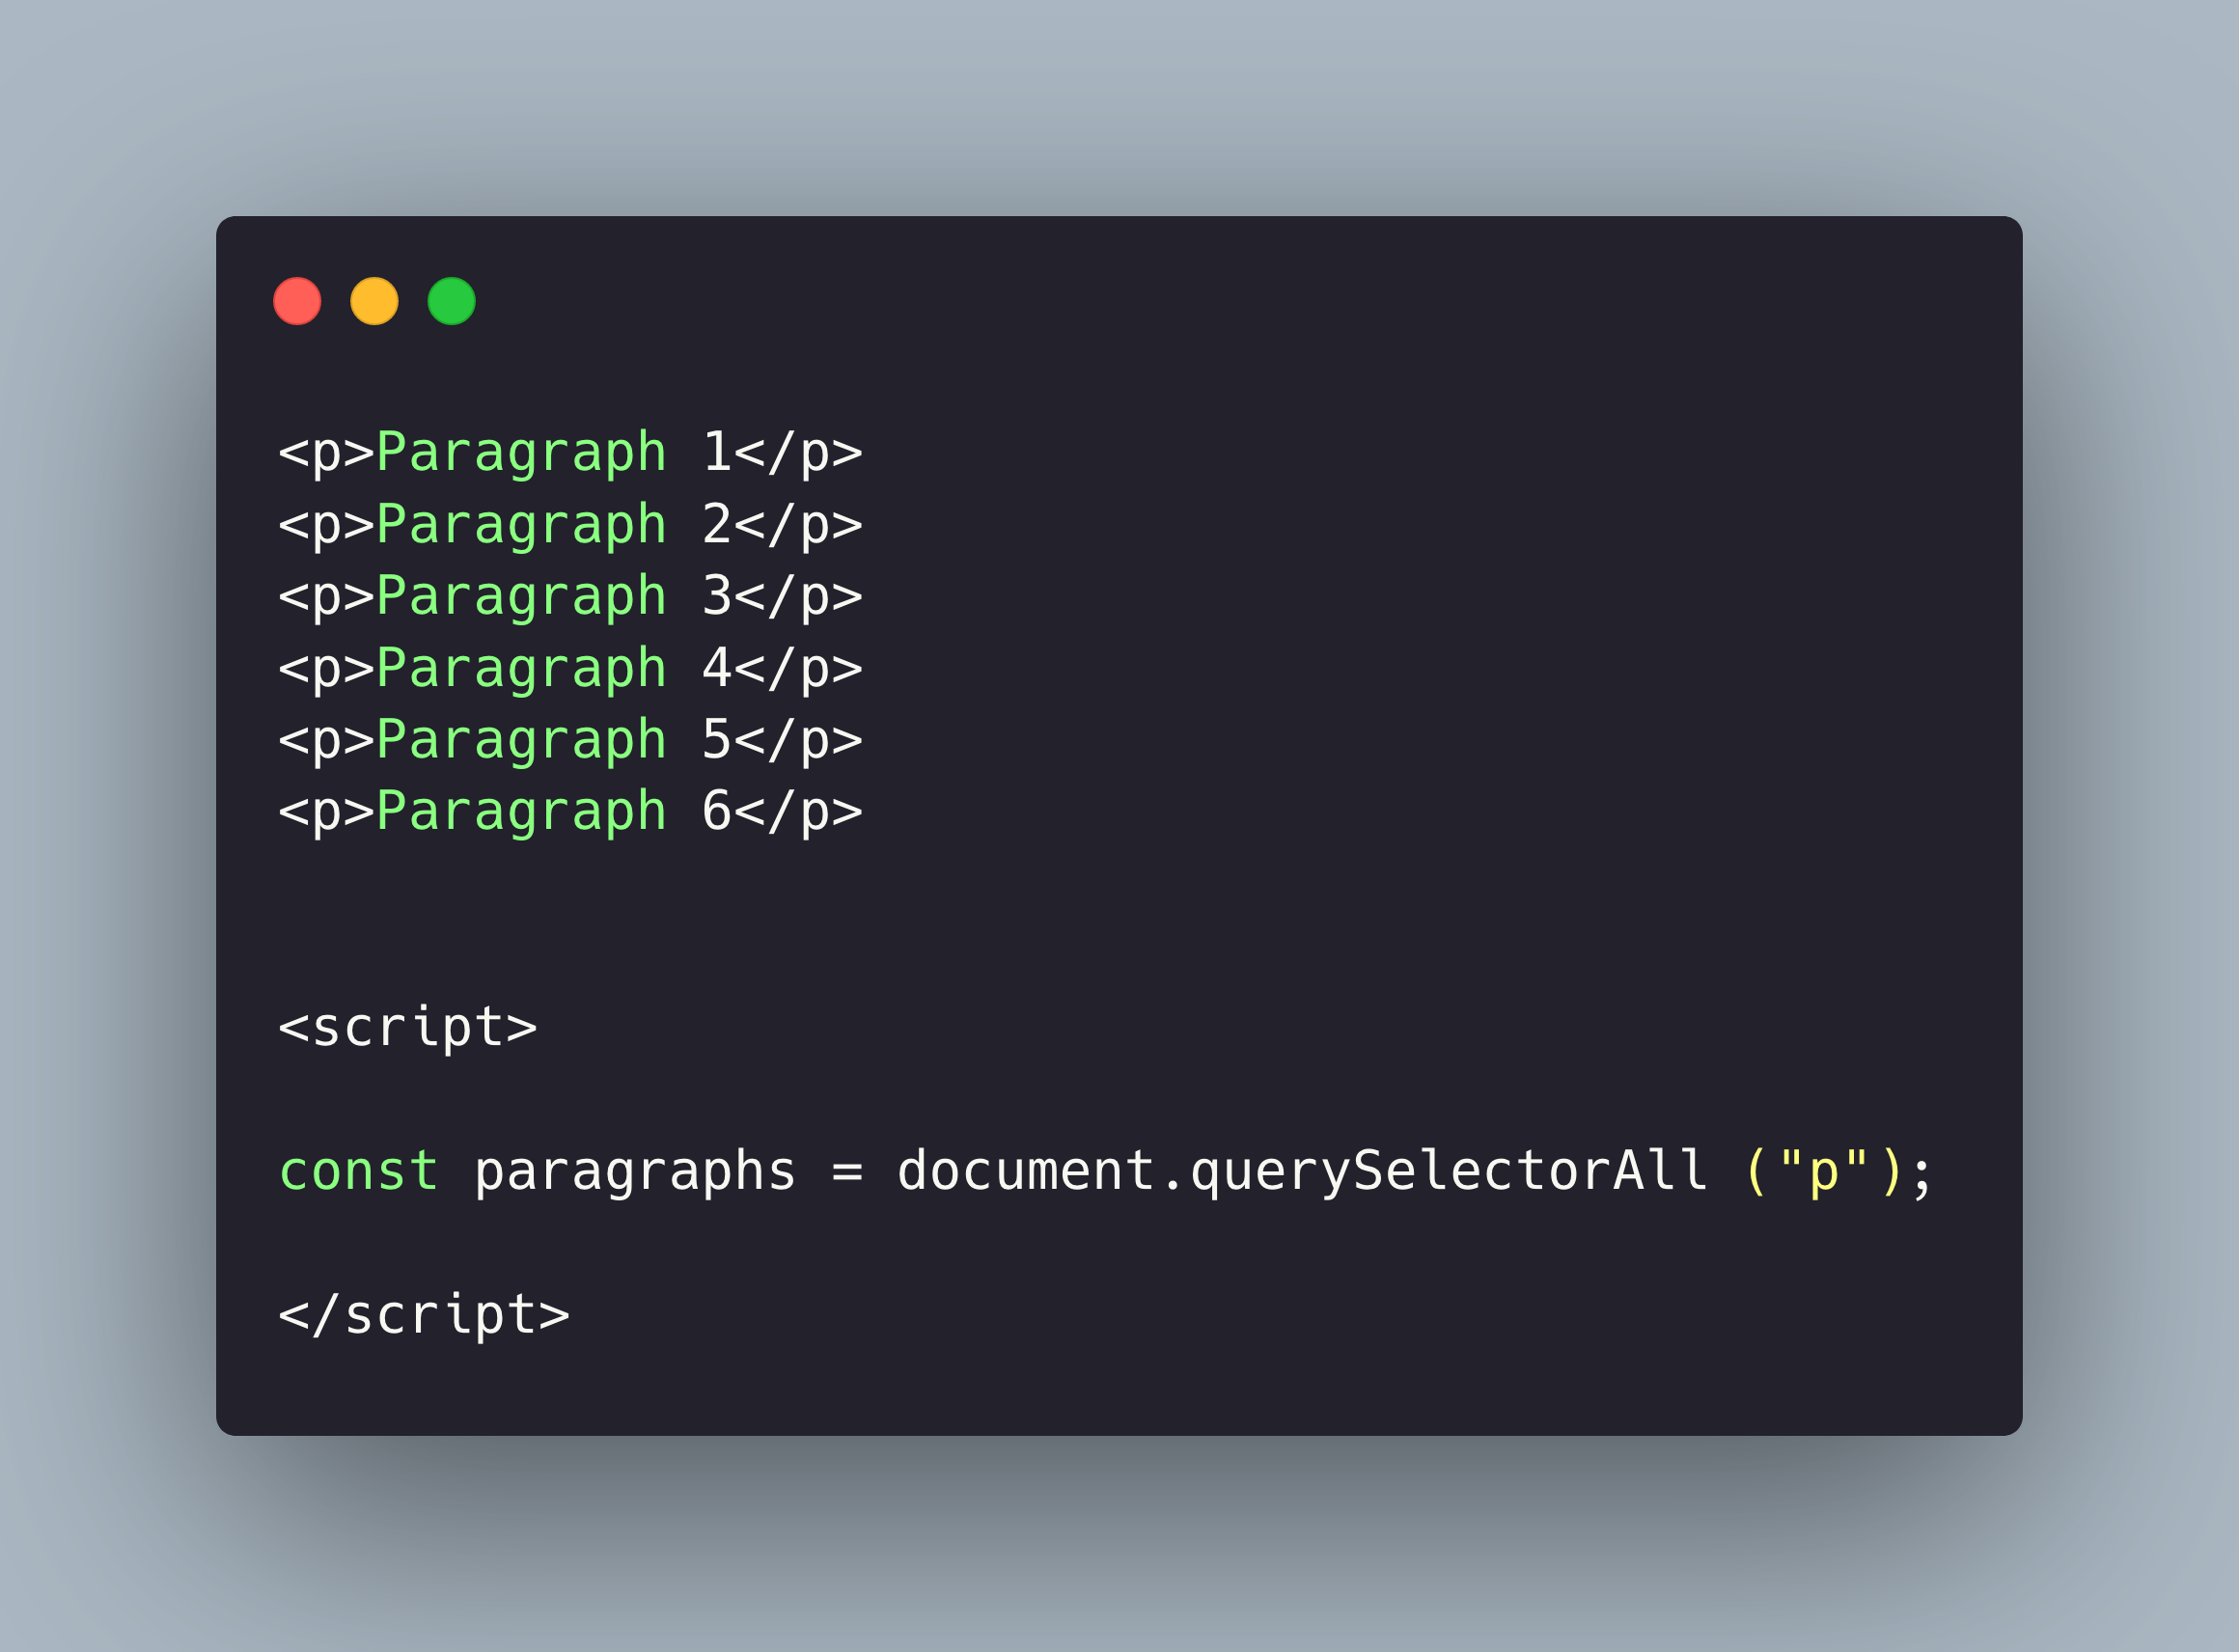
querySelector(), selects only 1 element from the DOM and returns nulls if it doesn’t find any. Below you can see an example of how to select DOM elements per tag, class and id.
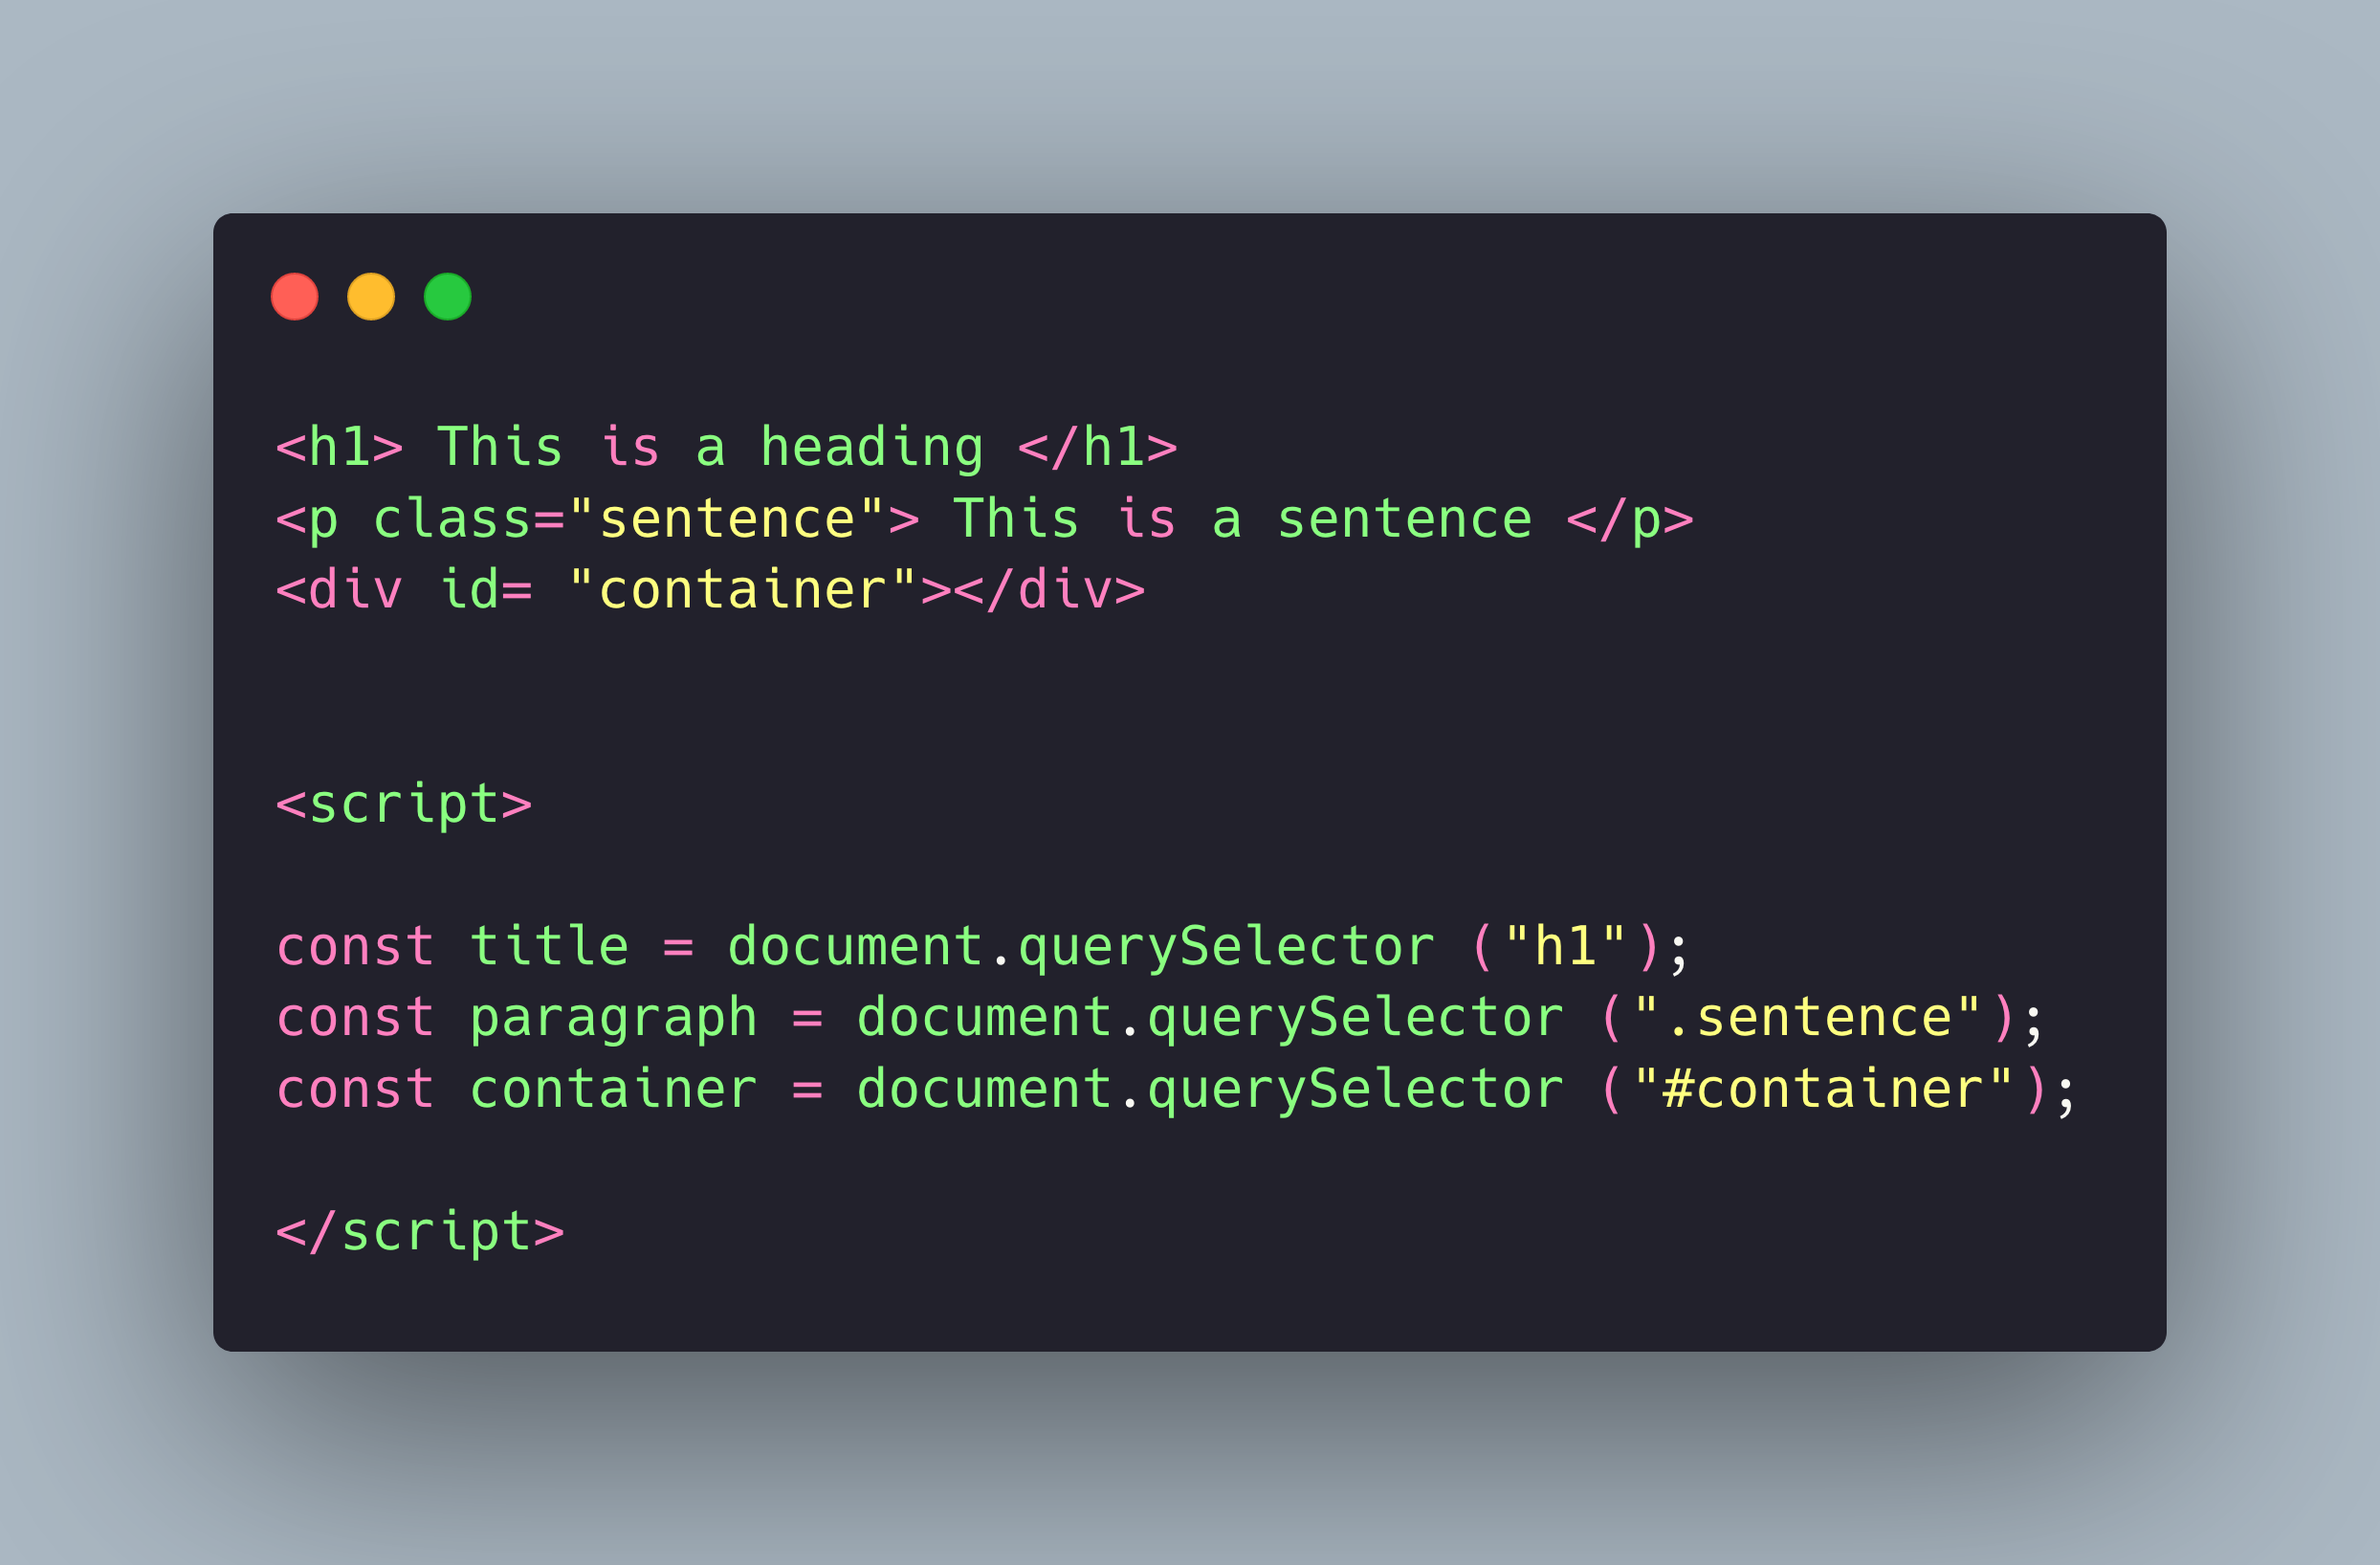
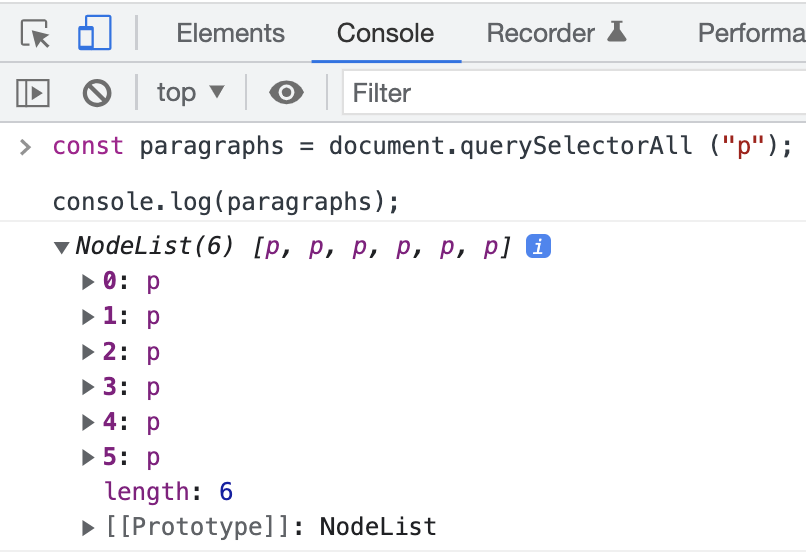
querySelectorAll(), selects several elements returning a Nodelist (a collection of DOM elements).
DOM styling
Once we have the selectors, what can we do with them? We can start with modifying any kind of DOM element, for example its styling by combining the style property and the CSS property (always written in CamelCase: fontSize, backgroundColor, etc.). For example:
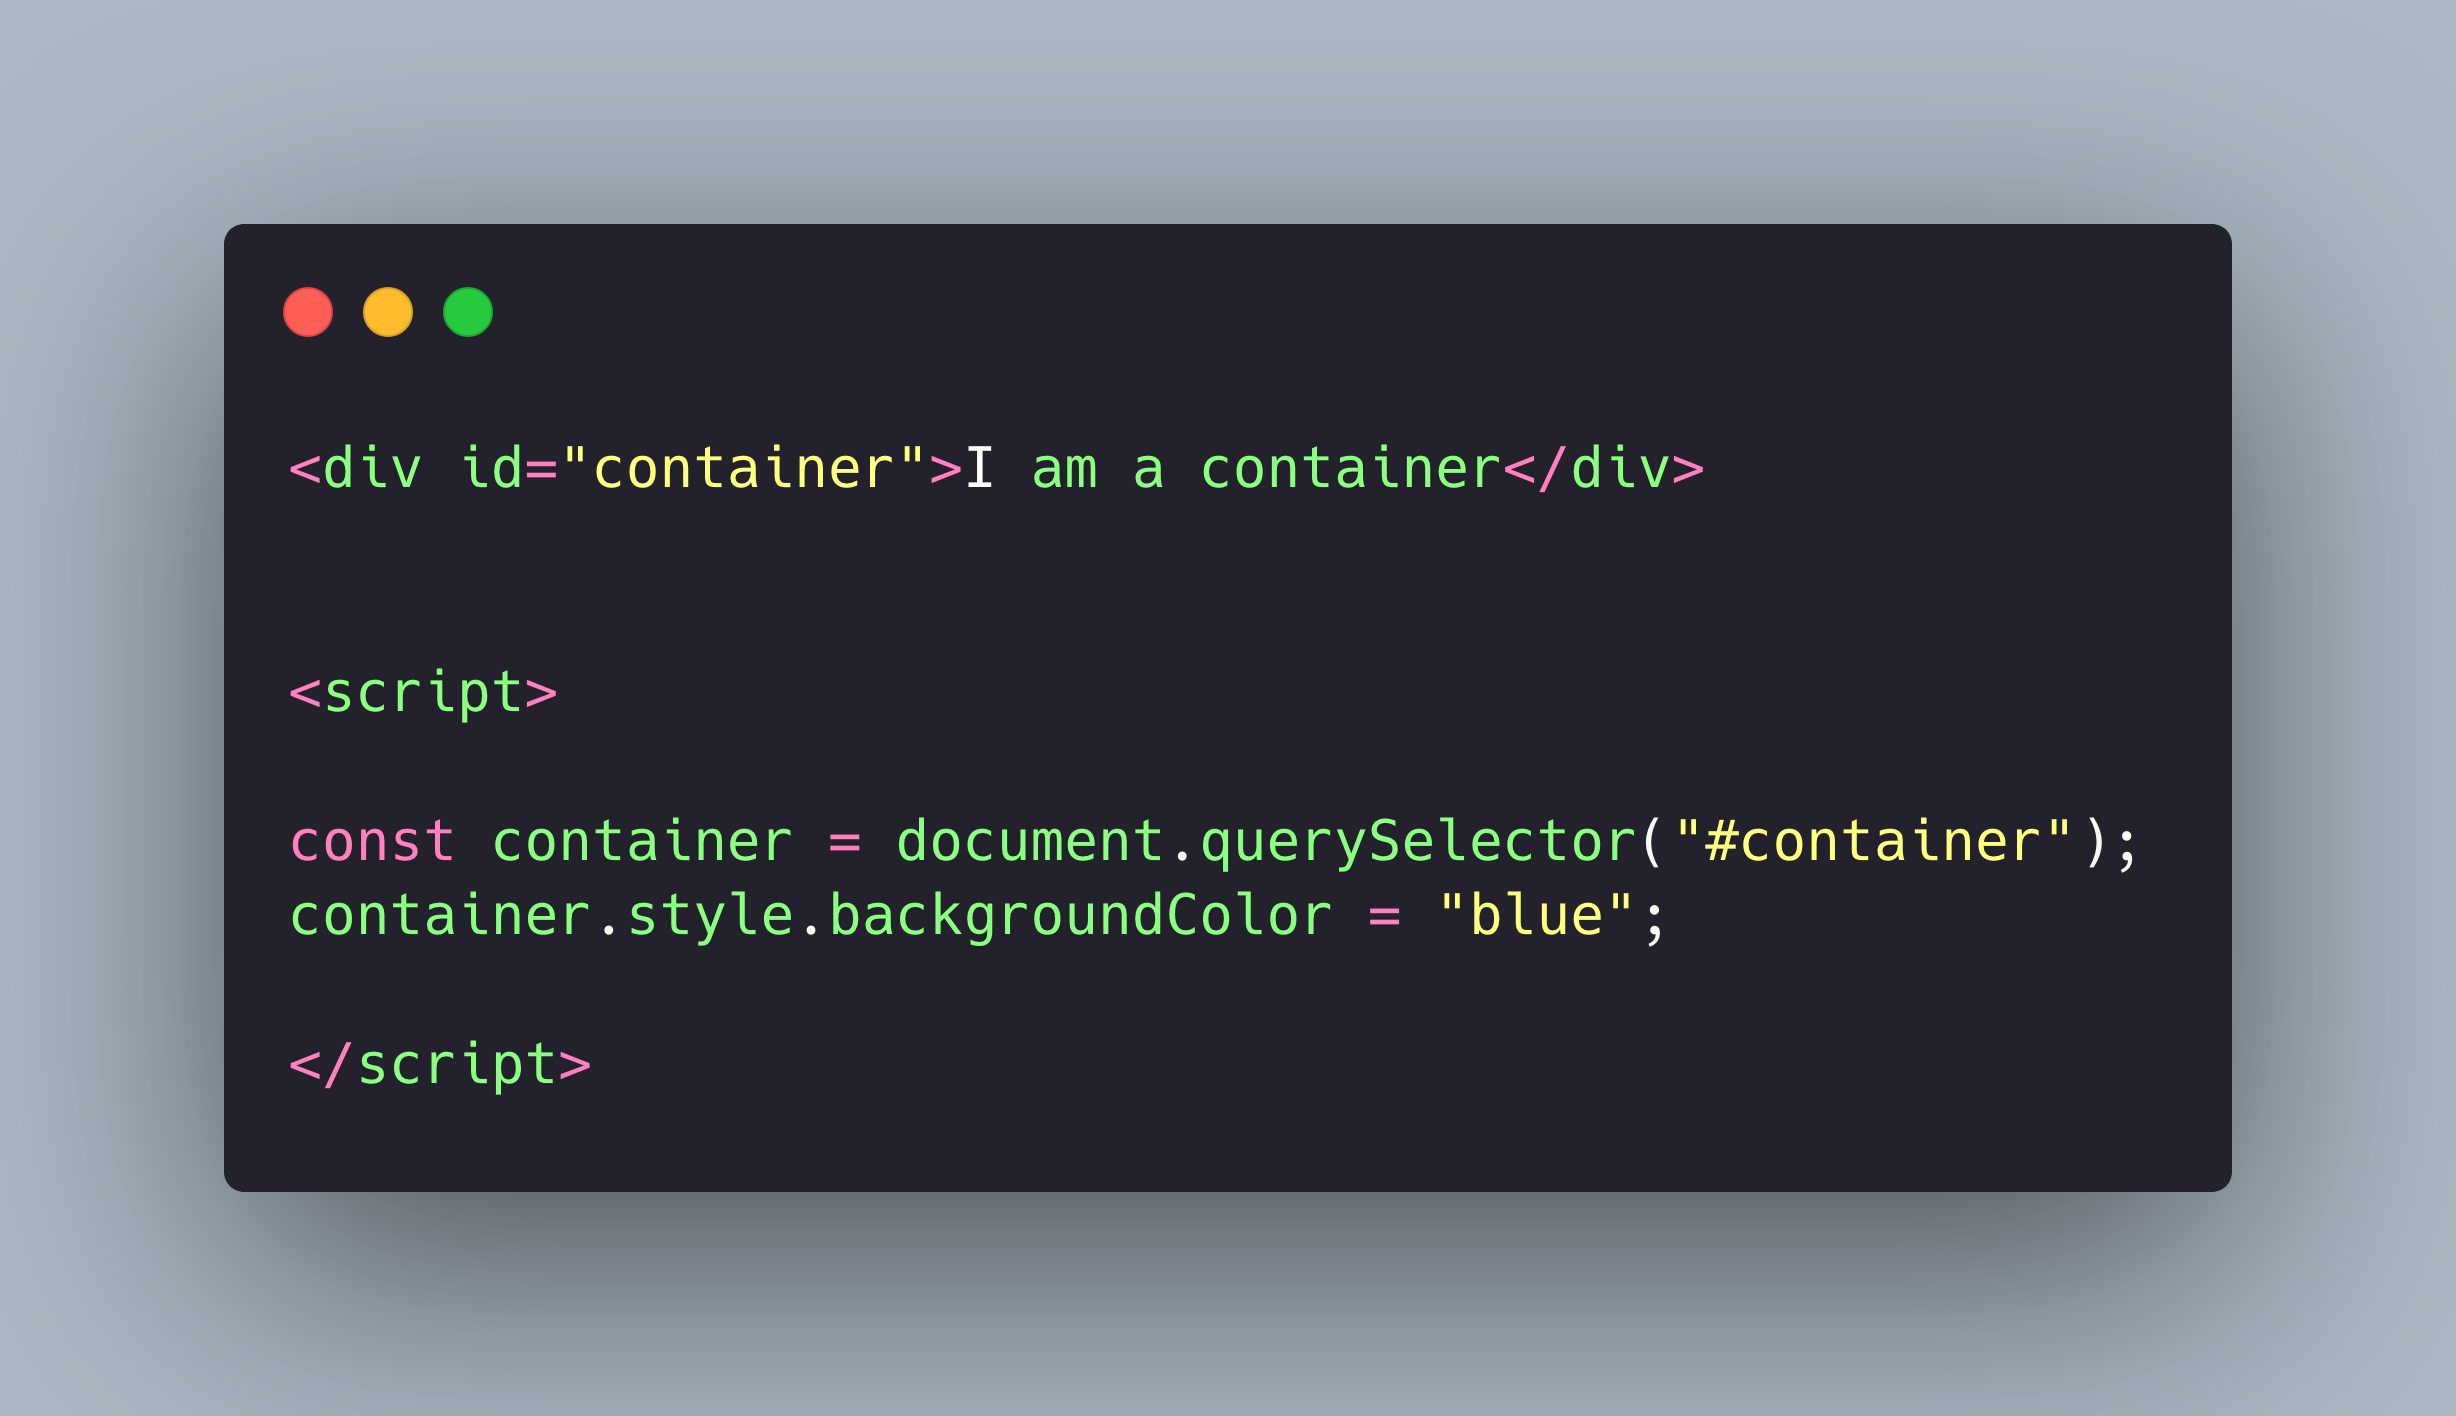
In the above example, we would apply a blue background color to the container.
DOM modify text
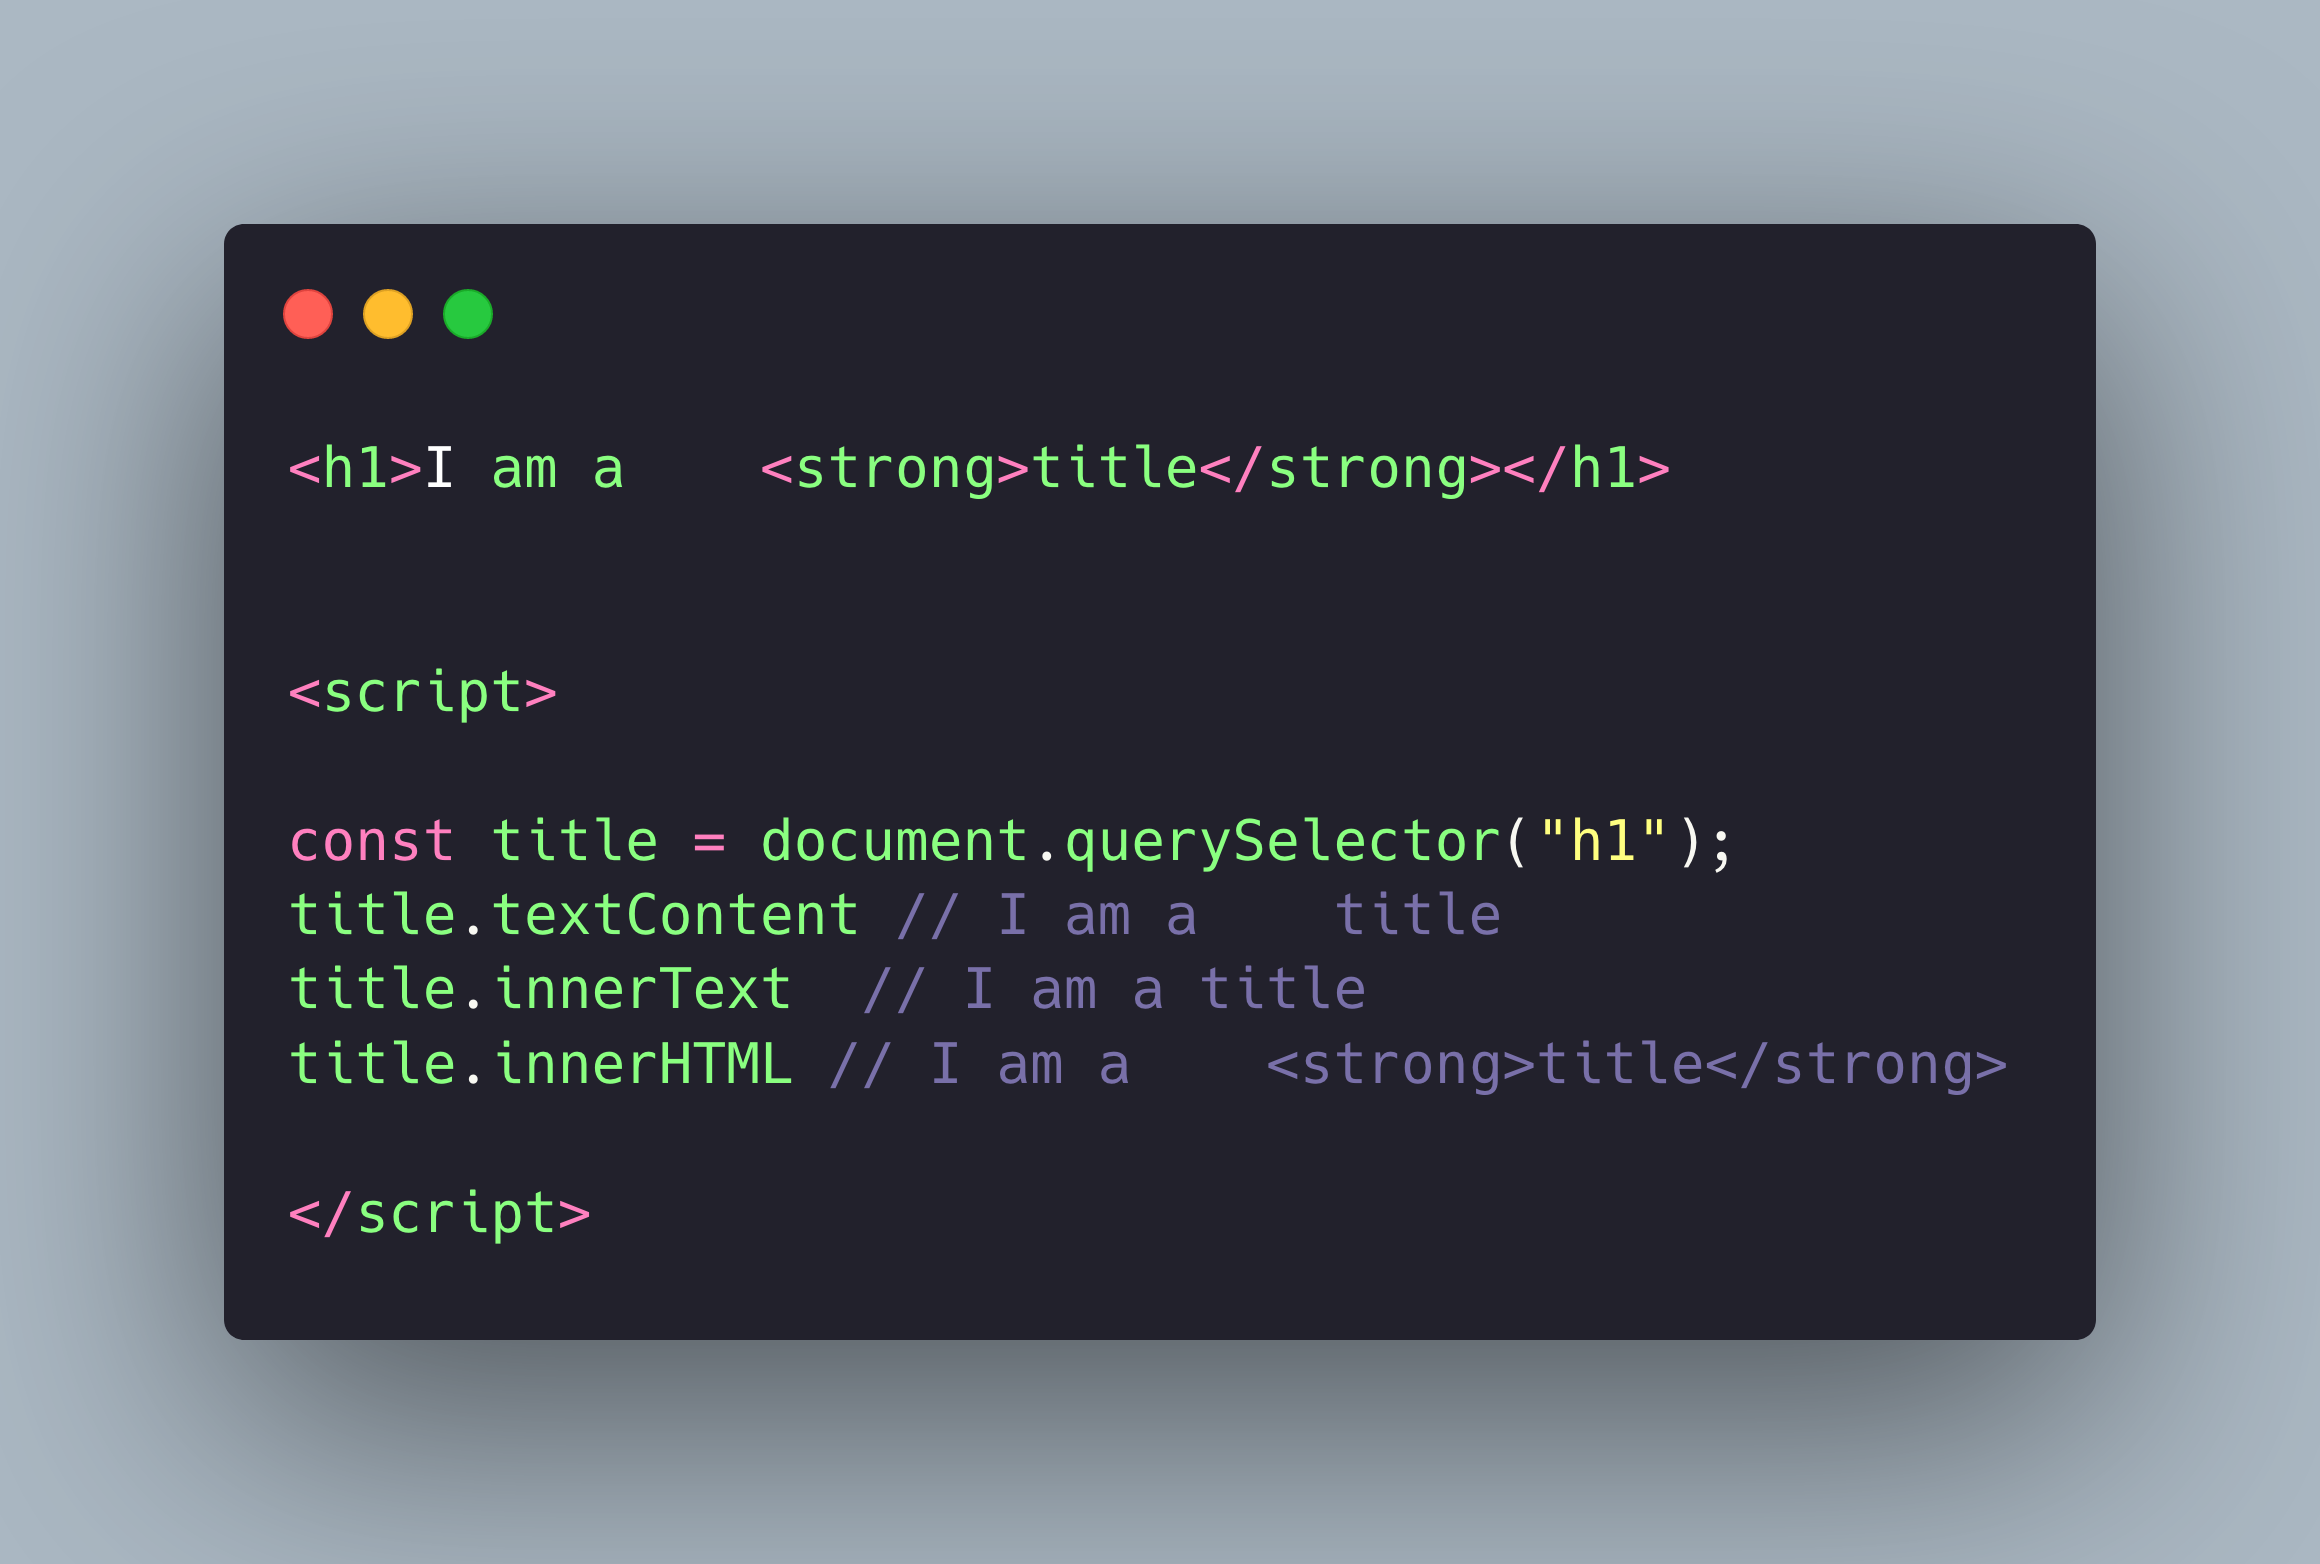
We can also manipulate the existing content in our HTML with the following tricks:
- textContent → returns all content between the html tags like h1, p, div, etc, considering also the styling. It doesn't work with input, select and textarea. In this case we need to use .value.
- innerText → returns visible without considering any styling.
- innerHTML → returns the content and the styling tags. Not recommended to use due to security risk (it allows the user to manipulate the JS) It is better to use innerText.
DOM events
What happens when a user clicks on a button? If we want anything to happen after the click, we should work with event listeners. This is how we apply an event listener to a button:
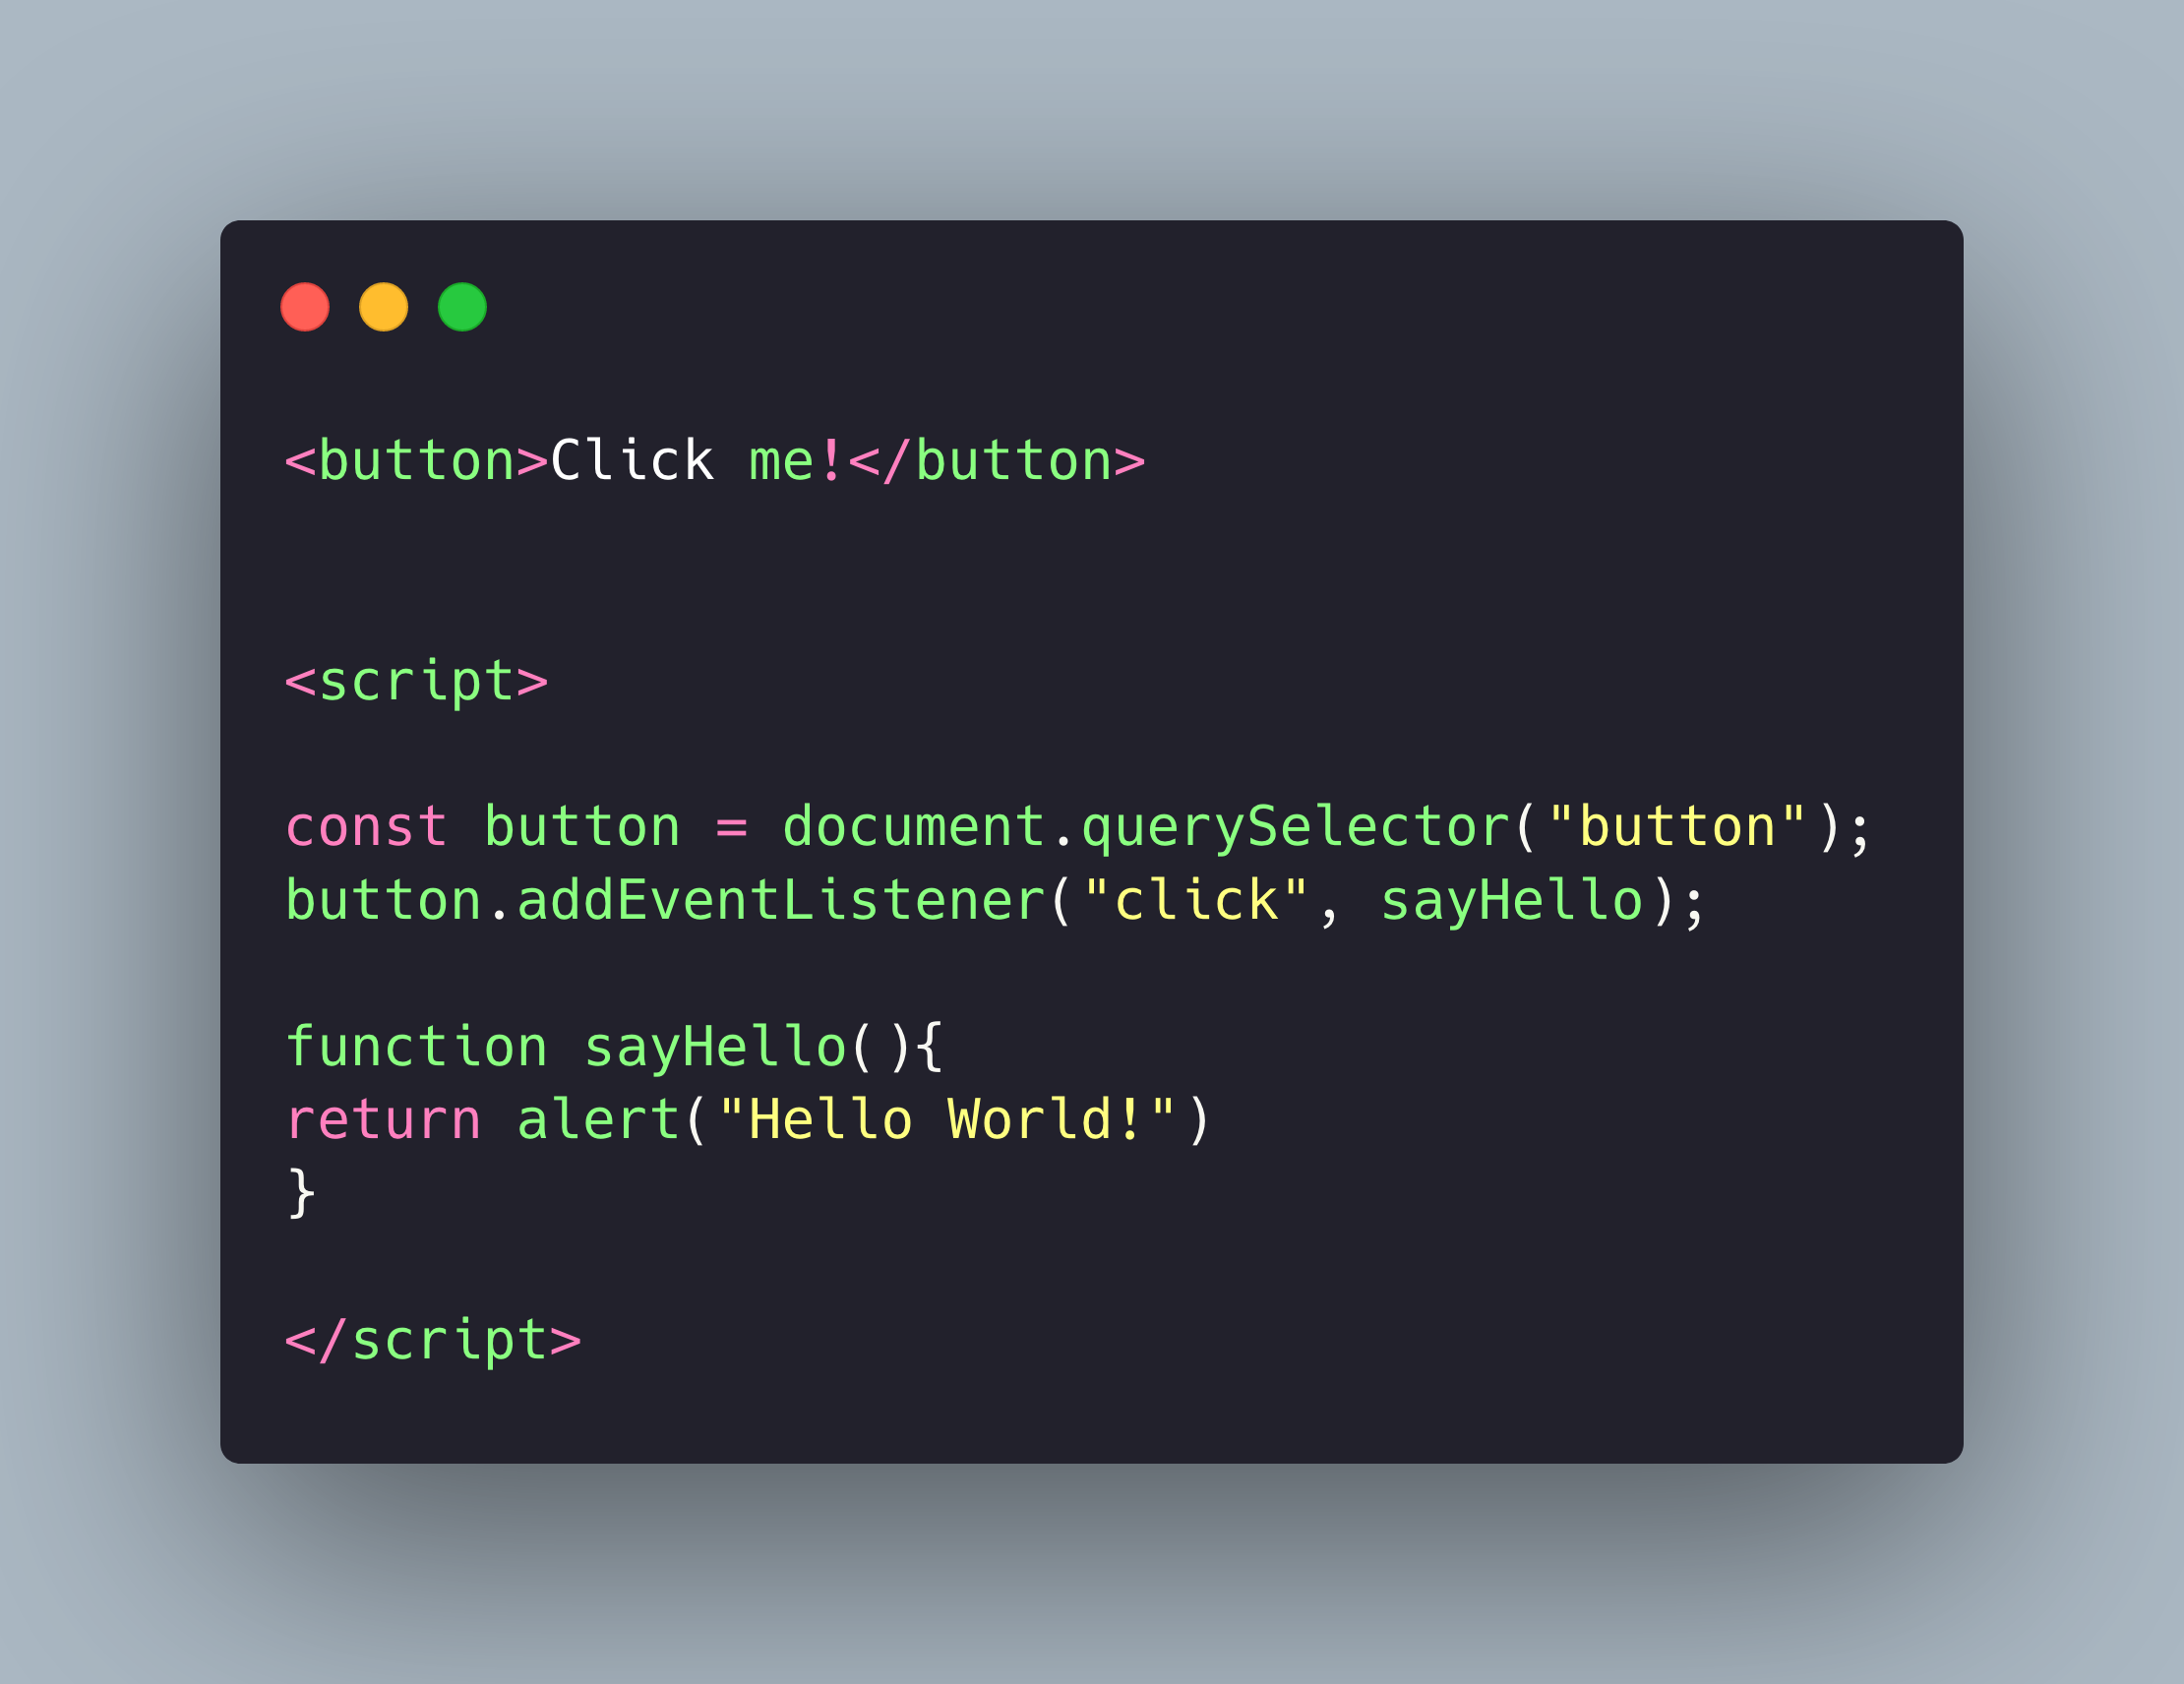
We select the button, apply to it an addEventListener that contains 2 pieces of information: the user’s click and the function or action we want to happen.

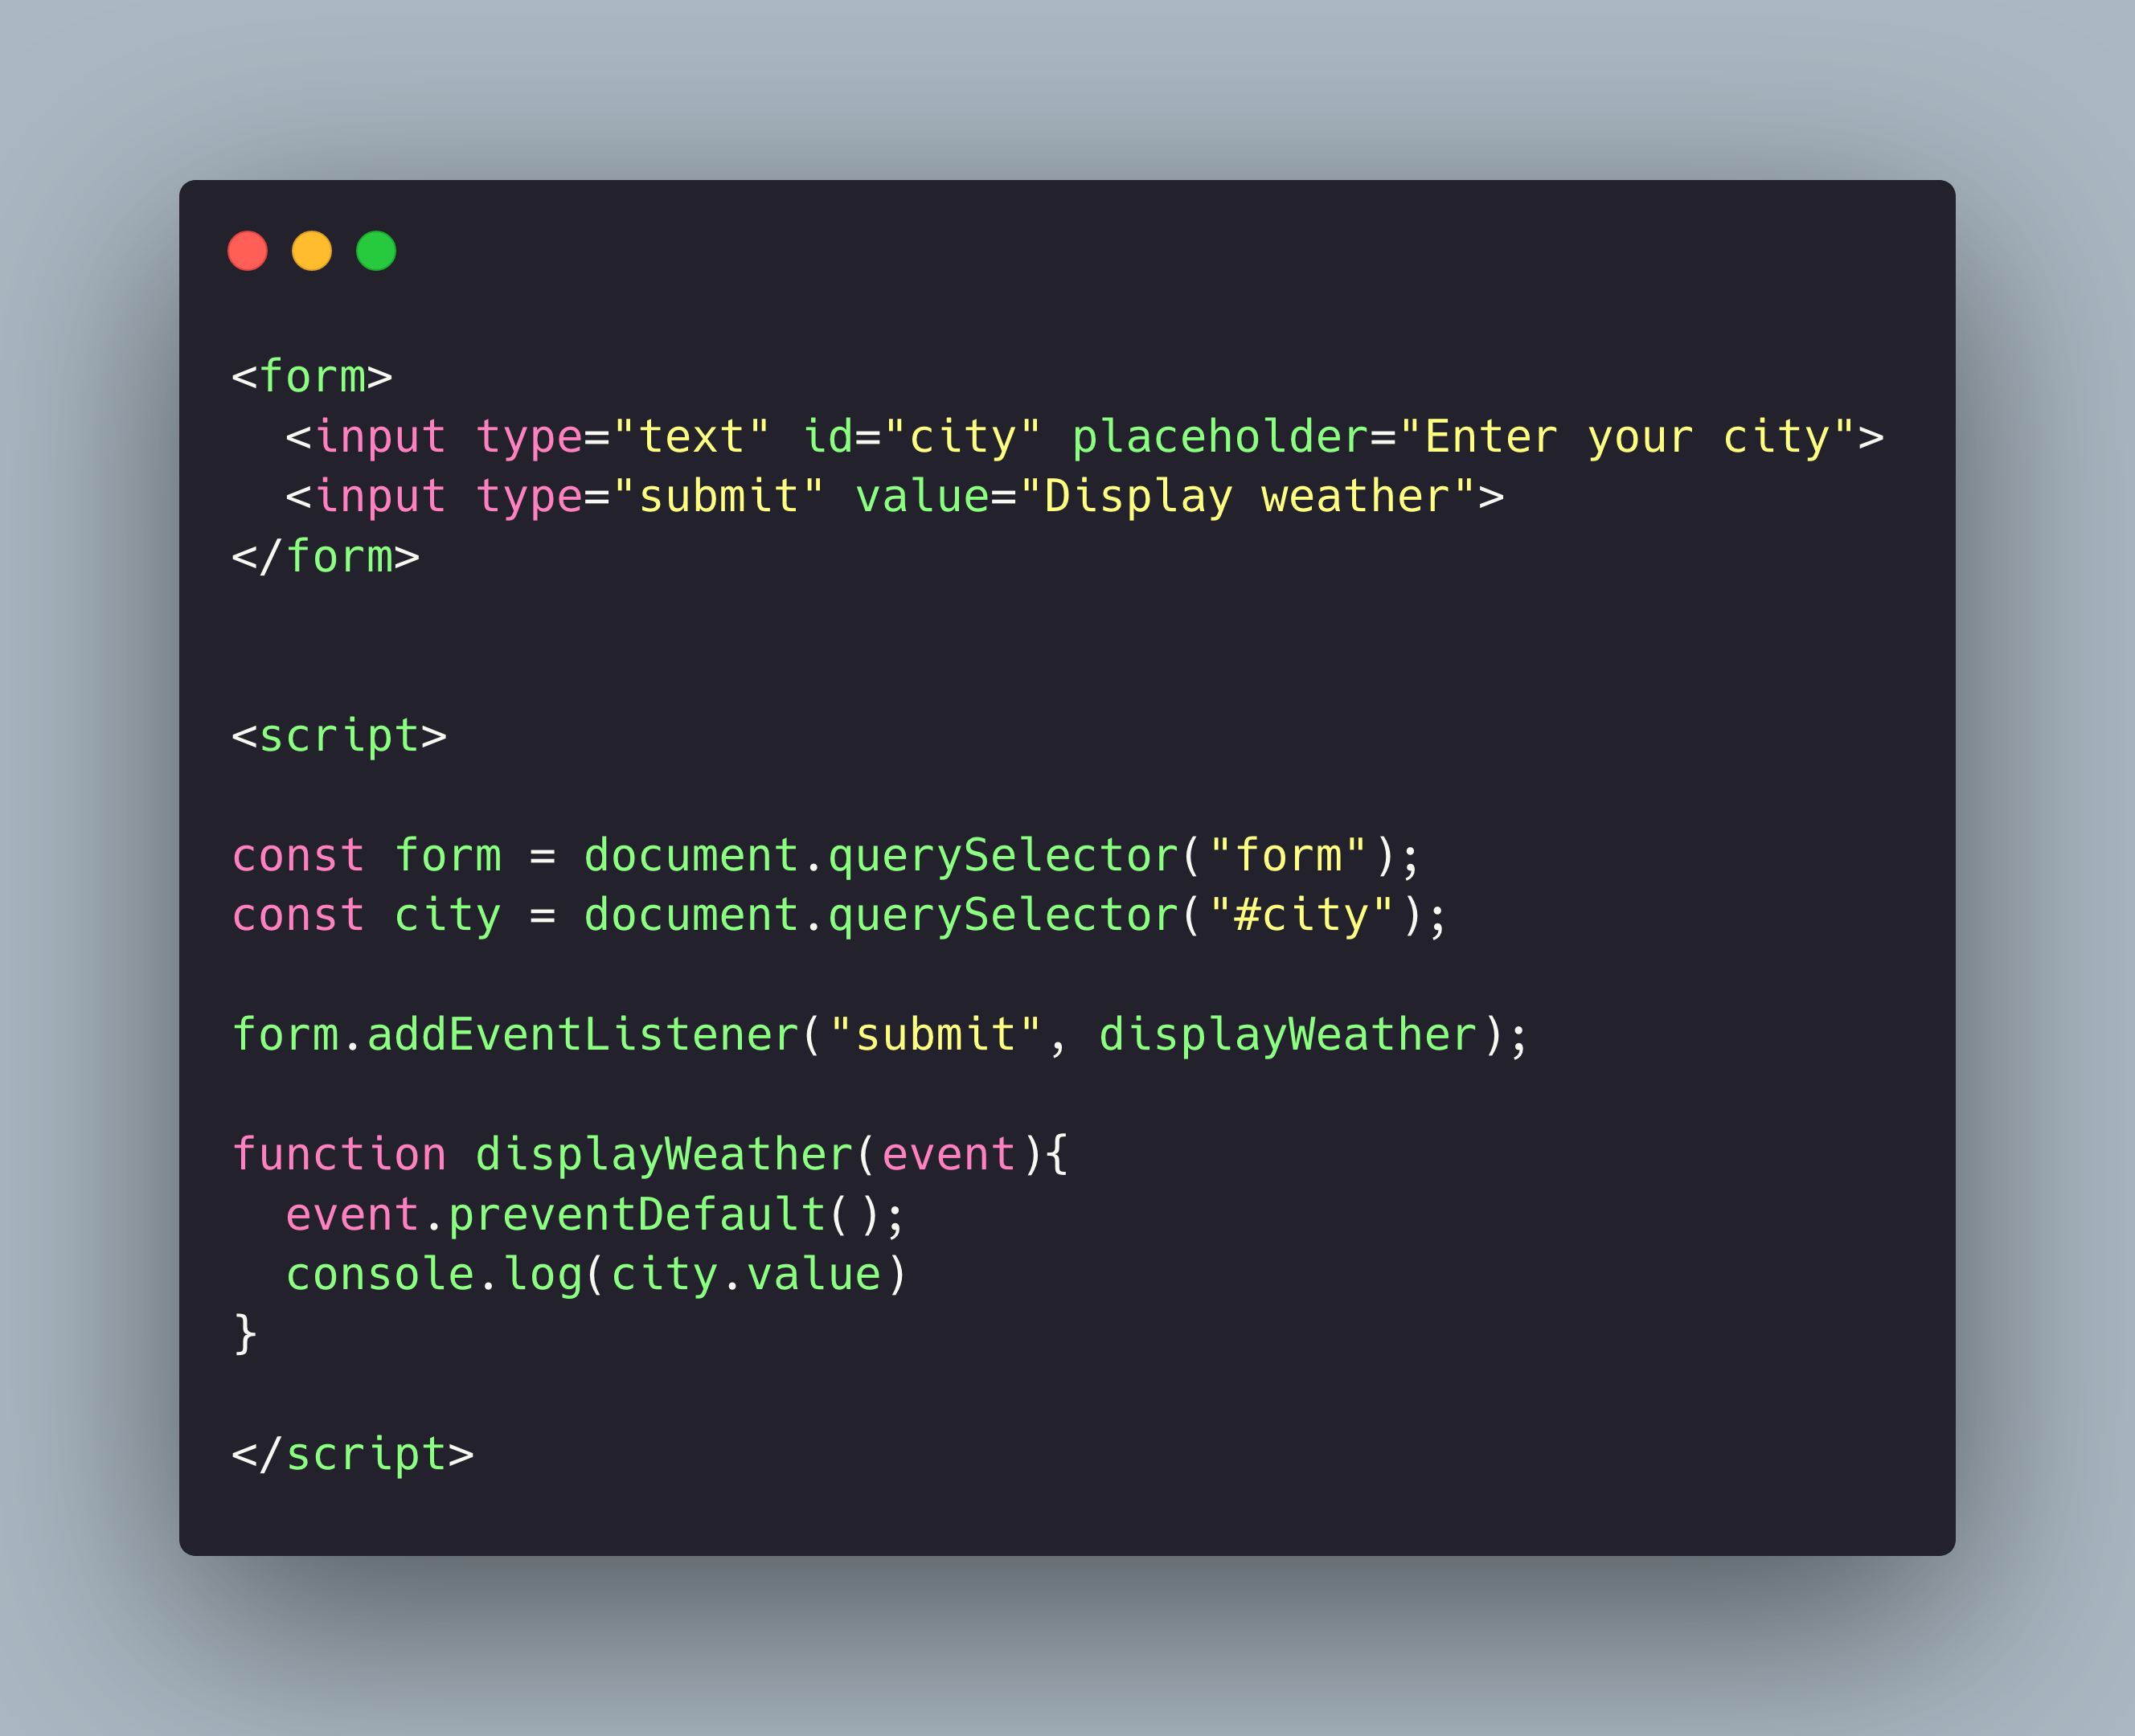
We can also use addEventListener() to execute an action when a user submits a form: the browser takes the values entered by the user and sends them to the backend. This makes the whole website load again. In order to avoid this we can use the method preventDefault().

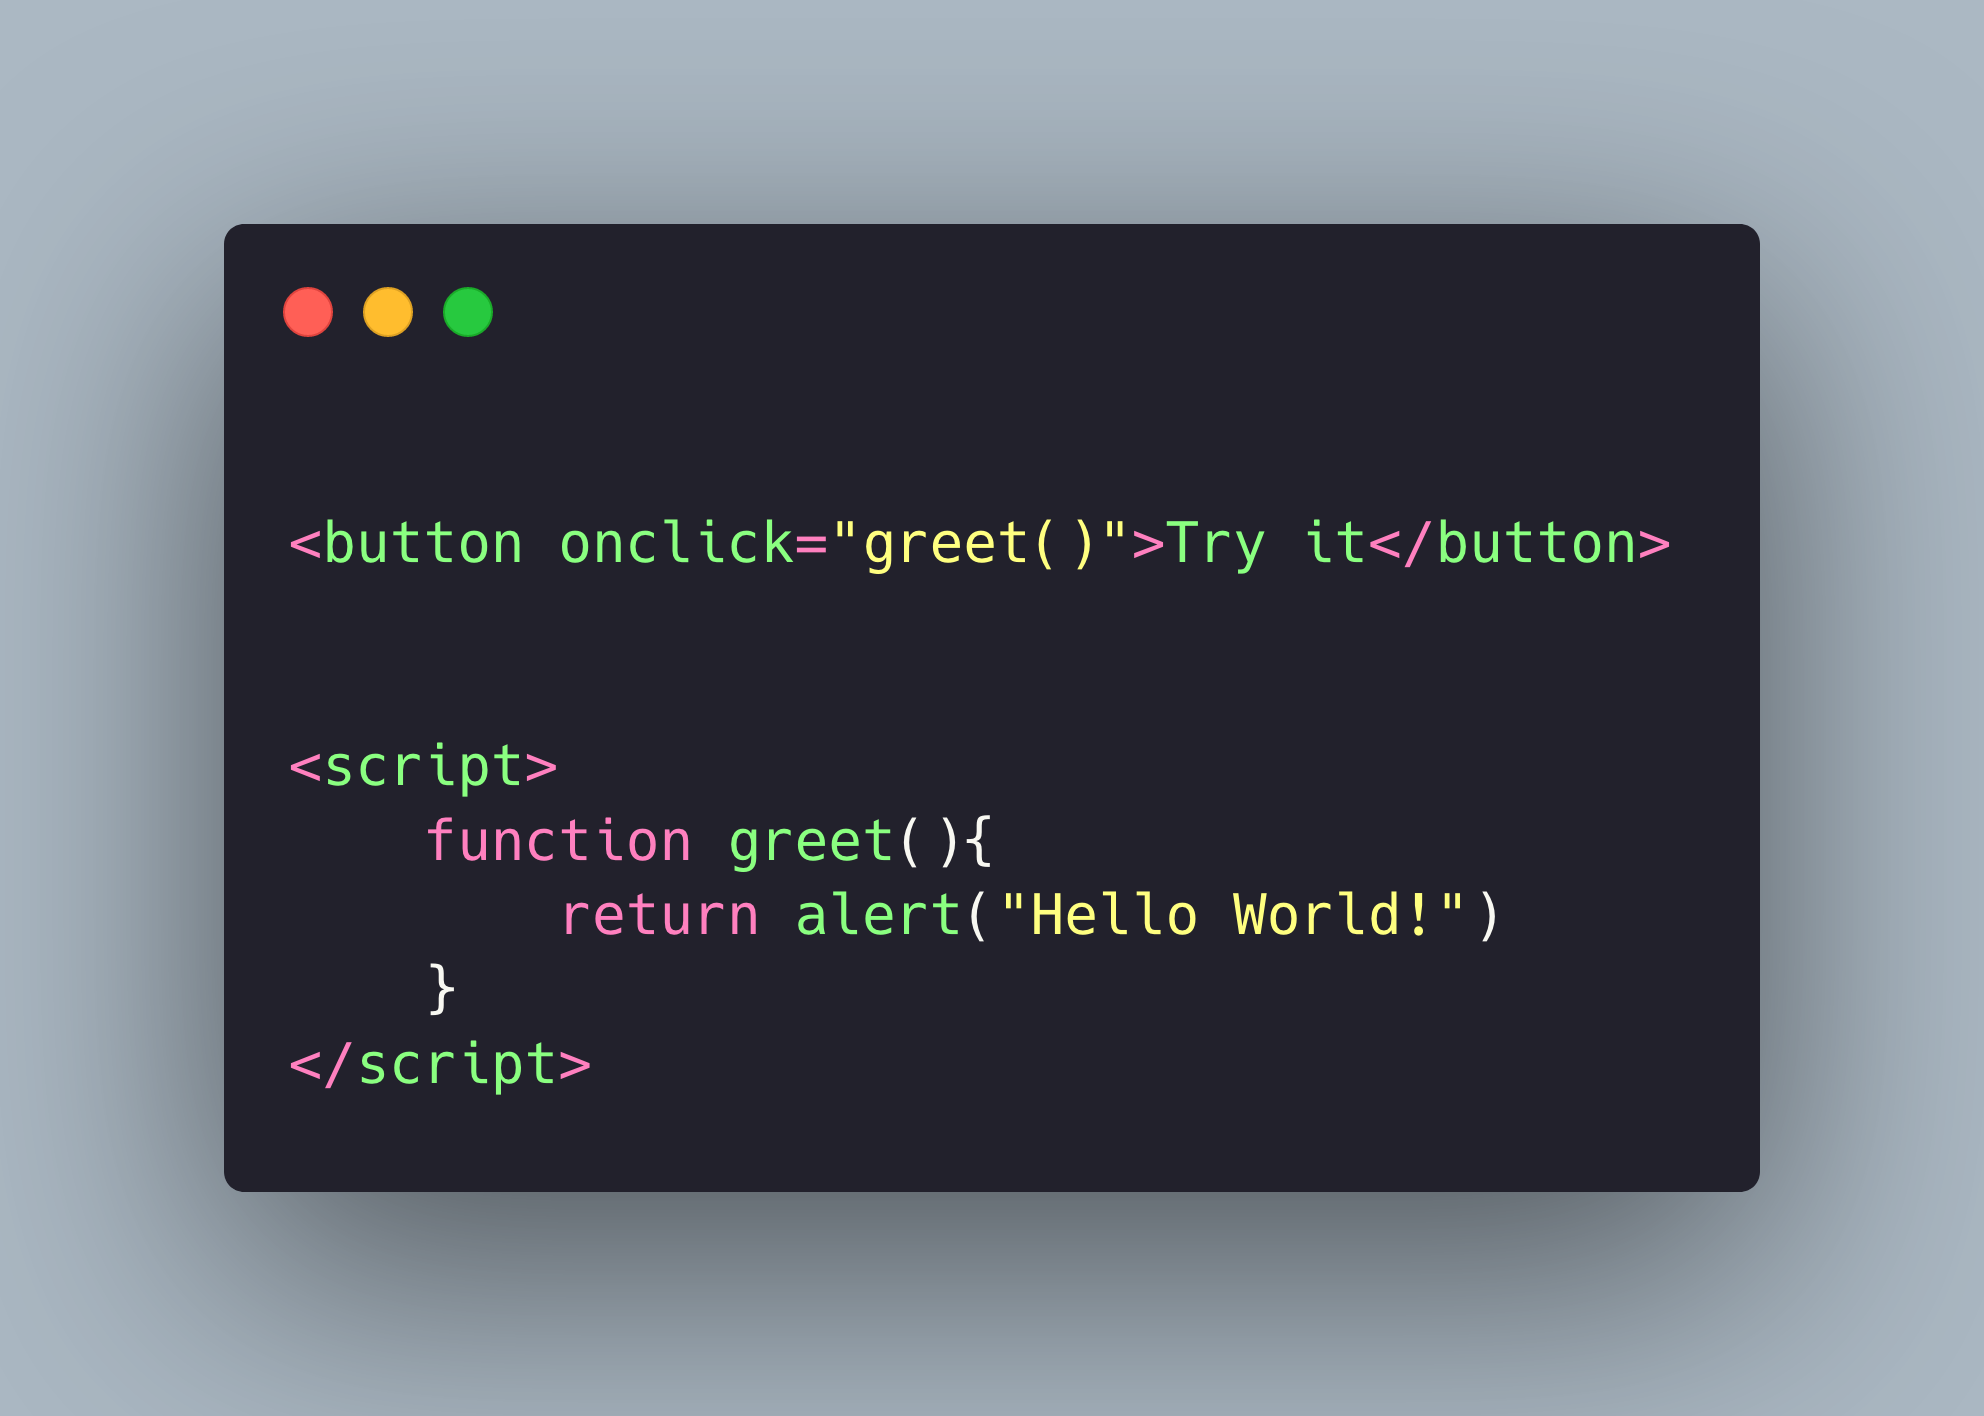
There is an alternative to addEventListener, which works the same way but it is applied directly on the HTML document: the onclick() event handler.
Time to practise! Below you can find some projects to go deeper into the previous concepts:
